Wire Jewelry Basics

Wire Jewelry Basics
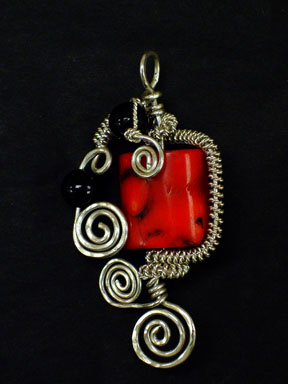
Here is a basic guide to making jewelry from wire that I use in classes. There's a lot of basic information here, everything from where to buy wire, to what tools to use! I hope it helps you enjoy making your own jewely.
Making jewelry out of metal wire is one of the oldest and most ancient traditions in the world of jewelry-making. Thankfully, the craft and techniques have evolved over the centuries into a simple and rewarding art that anyone can enjoy! First we need to know a few basics.
All wire is measured in gauges. The gauge determines the thickness of the wire. As the number measure of the gauge goes up, the wire gets thinner. So, a 26 gauge wire is very fine and is commonly used with pearls, whereas a 12 gauge is very thick and used for heavy duty applications. You can find wire in rods as thick as 6 and 8 gauge, or as thin as 32, which is more like a metal thread.
When working in Sterling Silver wire, you also have a choice in metal temperament, or hardness. The three classifications are dead soft, half-hard, and full-hard. Each has its own properties that make it useful for various applications. Dead soft wire is the easiest to use, is soft and easily manipulated. Because of its ease of use, dead soft wire is my favorite. Its ease also makes dead-soft the best wire while learning how to make jewelry. Half-hard, and full hard are a sturdier but more difficult wire with which to work.
The durability of half and full-hard wire can be worked into dead soft wire through a process called work hardening. As you use and manipulate sterling silver, it gets harder and harder. This process of work hardening, jewelers often use to their advantage. Any hammering, twisting, bending, even winding sterling wire onto a spool can harden it. Usually, this is a good thing. Once in a while a piece will become too hard to work. When this occurs, one must anneal the piece. This involves heating it with a torch until it glows orange, then remove the flame and quench the piece. The result of heating and cooling the piece will be that the metal is once again soft and pliable.
Heating sterling silver has one unfortunate consequence: fire-scale. Fire-scale is a black, burnt surface on a metal that has been heated. Fire-scale must be removed and it can be somewhat laborious to do so. You can remove it by soaking the work in an acid bath known as pickle, then filing and finally polishing. You can avoid fire-scale entirely by using fine silver, instead of sterling silver. Fine silver is more expensive, and softer than sterling but can be very rewarding to use. I personally avoid fire-scale altogether by preferring to make solder-free jewelry which is never heated or using fine silver whenever possible.
The price of sterling silver and gold wire fluctuates on a daily basis. The price is based on the commodities market and can be volatile and greatly effect the cost of making and buying jewelry. While writing this, gold has reached a whopping $600 an ounce (a 25-year high), with sterling silver at $12.00 per ounce. That is a great deal higher than when I began making jewelry ten years ago, the price of silver having nearly doubled. In addition to the market price for metals, each company that sells metal for jewelers has an added "refractory" fee for each item. In something as simple as a sheet of metal and plain wire, these fees can only be a few dollars an ounce, but once you start getting into twisted wire, embossed metals and other types of materials that require a great deal of processing, these costs rise a great deal. My own personal sources for metal are Indian Jewelry Suppliers, Thunderbird Supply, and Rio Grande. These are all companies that specialize in supplying materials and tools for jewelers and hobbyists.
To reduce costs, you can use many other materials than Gold and Silver. Gold-filled wire is a heavily plated material that is far more durable than gold, but cannot be hammered much without breaking through to the base metal underneath the gold. Gold-filled costs more than Sterling, but a great deal less than 14Kgold. Copper is a wonderful metal to use as its properties are almost exactly like sterling silver, and it never gets fire-scale. Brass is somewhat more difficult to work with than copper, being a much stiffer and a more resistant metal. A side-note: copper and brass both react to the acidity levels in your skin and sweat; that is what causes your skin to "turn green" when wearing these types of jewelry. To avoid this, it is helpful to varnish your work once completed. Clear nail-polish works well.
Things to avoid are colored wires, and plated wires. Plated metal is very thin, and flakes off easily, being comprised of only a tiny layer of precious metal, whereas "filled" metals are heavily bonded onto a base metal and rarely come off. Wires that are colored will always have a spot where they are cut, and you can see the base wire underneath which is never the same color. This makes it difficult to file out burrs, and you can wind up with sharp edges or off-color spots. If you like to use colored wires, look for the type that has had the actual metal colored, like the artistic-wire brand. Some wire is only covered in a plastic coating/tube that has the color on it. This always leaves annoying sharp edges wherever the wire is cut.
Tools: Most of the tools involved in wire-working are pliers. There are many different types of pliers and each has a specific purpose. Round-nosed pliers are used to make round loops, spirals, coils, and anything that requires a rounded shape. Chain-nose pliers are used mostly to hold and bend wire and metals. They come in many different types such as smooth-jawed, serrated-jawed (which can leave scratches on your piece), bent-nose (works wonders for getting into small places) and long and short varieties. They can also vary in the size, and shape, some being rectangular, others more triangular. Unfortunately, the only real way to learn about the different uses for pliers is to become familiar with them. Each person inevitably will find out which tools they prefer through trial and error. Every person is different, therefore every jeweler will be different and prefer different tools.
Anyone interested in buying tools and working with metal will also need cutters. Having good, sharp wire cutters is a must and a special "flush-cutter" that leaves neat clean edges to metal is usually recommended. If you are interested in making "hammered" jewelry pieces you will need jeweler’s hammers and a bench block. The most common jeweler’s hammer is a ball peen hammer. Bench blocks are simply squares of heavy steel. If you can’t locate one, the backs of large vises often have an anvil-like shape on them you can use. Mallets are also useful for hardening pieces without striking/marking them with a hammer.
I hope this is a helpful start to your wire-working adventures. The best way to learn about this craft, however, is to just dive in and make some jewelry! So roll up your sleeves and have fun! And remember, you can always email me your jewelry-making questions.
posted by Adina's Artistry @ 9:42 AM
1 comments
![]()

